How to Create Index in Database with Entity Framework Code First
As of Entity Framework version 6.1, it is possible to create index in the database, specifying this directly in the classes in the source code. This creation of the indexes is carried out through the Index attribute directly on the class property. But beware: this is only possible using EntityFramework's Migrations feature.
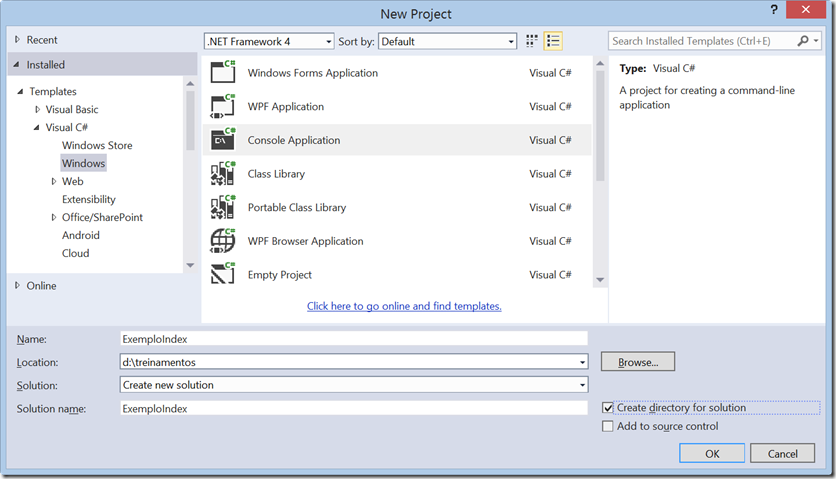
To demonstrate this feature, let's create a Console project in Visual Studio and add the Entity Framework Code First using the NuGet package.
Creating the Console Project:

Adding the Entity Framework Code First with NuGet Package (Tools / NuGet Package Manager / Package Manager Console) and we will add the package with the command below:
PM> Install-Package EntityFramework
Let's now add our Context class:
public class Context : DbContext
{
    public DbSet<Client> Clients { get; set; }
}
And then the Client class:
public class Client
{
    public int ID { get; set; }
    public string Name { get; set; }
    public string City { get; set; }
    public string Country { get; set; }
}
Creating the indexes:
Let's imagine that you need to create an index for the Client class name property. We will then use the Index attribute and also the MaxLength to determine the maximum field size. The Index attribute is in the Namespace: System.ComponentModel.DataAnnotations.Schema
public class Client
{
    public int ID { get; set; }

    [Index]
    [MaxLength(100)]
    public string Name { get; set; }

    public string City { get; set; }
    public string Country { get; set; }
}
See that it is very simple, just add the Index attribute on top of the property you want the index! You can also give a name to the index and, if it is a composite index (more than one property), indicate the position of the property in the index.
To name the index, simply inform, for example: [Index("MyIndex")] and if you also want to inform the position, add it right after the name. You can still indicate whether the index is Clustered or Unique. The index name is not required.
Remembering what I said at the beginning of the post, the creation of the index is done using Migrations, and now we will add it to our project using the Package Manager Console again:
PM> Enable-Migrations
Now we can start sending migration commands to create or update our database. We then begin by adding a checkpoint for migrations:
PM> Add-Migration CreateDatabase
If you check the code generated by Migrations, you will see the creation of the index (in this example I named the index "MyIndex"):
public partial class CreateDatabase : DbMigration
{
    public override void Up()
    {
        CreateTable(
            "dbo.Clients",
            c => new
                {
                    ID = c.Int(nullable: false, identity: true),
                    Name = c.String(maxLength: 100),
                    City = c.String(),
                    Country = c.String(),
                })
            .PrimaryKey(t => t.ID)
            .Index(t => t.Name, name: "MyIndex");
        }
    }

    public override void Down()
    {
        DropIndex("dbo.Clients", "MyIndex");
        DropTable("dbo.Clients");
    }
}
See the command .Index(t => t.Name, name: "My_Index"). It is the one who will create the index when we apply the change to the database, but before creating the database, we must not forget that the connection string must be in app.config or web.config (in the case of web applications). Let's add the line with the connection:
<connectionStrings>
    <add name="Context"
        connectionString="data source=(local);initial catalog=EFIndex;user id=test; password=test"
        providerName="System.Data.SqlClient"/>
</connectionStrings>
Now let's create the database with the index by running the Update-Database command:
PM> Update-DataBase
There, our database was created with the index we determined. See the Management Studio screen:

Instead of creating the database directly, you can also add the –Script parameter to the Update-Database to generate the script for your database.
You can now add index creation to your Entity Framework projects and thus improve the performance of your queries.
