How to Create a Visual Model with Entity Designer in Entity Framework
Today, in a development project, it is very common for the programmer to have to know several database commands (Insert, Delete, Update, Select) to be able to develop, in addition to knowing about the programming language. Entity Framework comes to help with this task, creating a correspondence between the database tables, which we call ORM, or Object-Relational mapping.
There are, basically, two ways to work with Entity Framework, using Entity Designer or Entity Framework Code First. The difference is simple: in the designer, you need to create a database diagram visually, using an EDMX file, which must be specific for each database in your application. For each database, it is necessary to use an EDMX file. In this article we are going to create a visual model and analyze its aspects.
Mapping the database with Entity Designer:
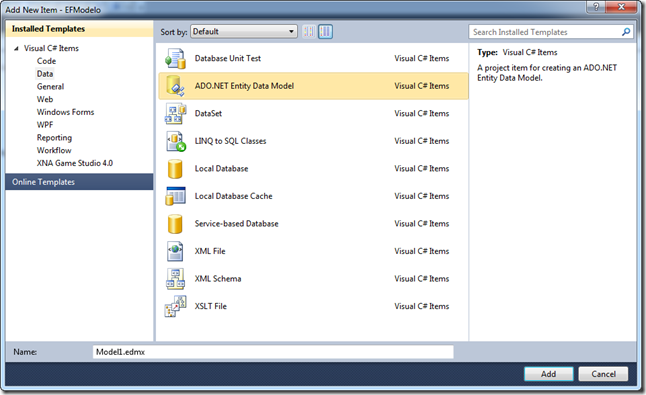
Open Visual Studio 2010 and create a project in .Net Framework 4 of the Console Application type, then go on to add a new item. You will see the window below, choose ADO.Net Entity Data Model:

We can also choose whether to create our model from a ready or blank database:

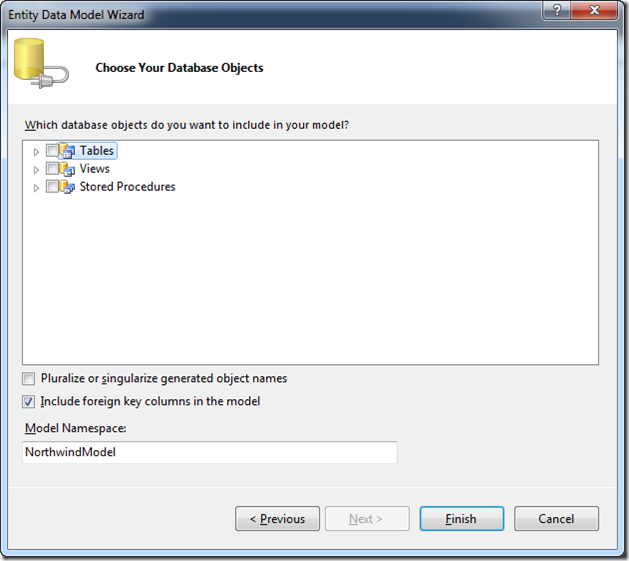
We will generate our example from the NorthWind database, choosing the option "Generate from database". On the next screen, create the connection to the database and then choose which tables, views, or stored procedures you want to map:

In our example we choose all tables, views, and stored procedures. Once this is done, we will have the visual model ready:

This process generated an EDMX model, which basically contains three parts:
- Storage Model Content: contains information from the database, such as tables, data types, etc.
- Conceptual Model Content: contains the definition of the model, which you can see in the diagram, such as classes, complex types, associations, etc.
- Mapping Content: makes the connection between Storage and the Conceptual model.
The source code of the classes is also part of the model, within the Designer file:

This file contains the source code for all classes of our model. But then if I create a new model, will the classes be generated again? The answer is yes.
Oops, but then we have a problem, we will have duplicate classes and how are we going to solve this? With POCO classes, which can be independent of the model. For this, we will make some small modifications to our model.
If you are going to use only one database you do not need to work with POCO classes.
Working with POCO in Entity Designer
The first thing we need to do is to disable code generation by the designer. That is simple, just turn off the model's Code Generation Strategy property, putting none:

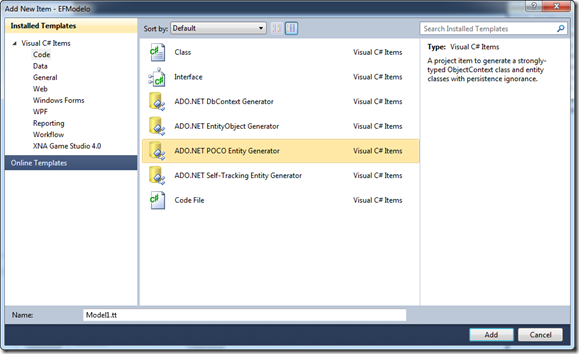
Now we need to add the classes again, and for that, we will use an automatic code generator, which we will add to our project:

When we add the ADO.Net POCO Entity Generator, two new files will appear in our project: Model1.Context.tt and Model1.tt. To generate the classes, we need to open each one and put the name of our EDMX file. See the example:

In our example it will look like this: string inputFile = @"model1.edmx". Do the same in the Model1.tt file. After doing this, save the file and our project will look like this:

We now have POCO classes, which are independent of the designer. If you modify the designer, once you save it, the classes will be updated automatically.
You can now add a new EDMX pointing to another database, for example, MySQL or Oracle, as long as they have the same structure logically, and you will use the same classes.
Using the model to retrieve the data
Now let's create a small code to list the Products and Categories of our model, using LINQ:
var db = new NorthwindEntities();

var datas = from p in db.Products
            select p;

foreach (var data in datas)
{
    Console.WriteLine("{0,-35} - {1}", data.ProductName, data.Categories.CategoryName);
}
In the next article, we will talk about the Entity Framework Code First.
